Creating a Class
Before creating a class you need to complete the following items in the software:
Categories
Before you can create a class you must set-up categories under “global settings”. You need the following categories completed to create a class: Genre, Level, Program, Location, Room.
Instructors
Add instructors so you can assign them to teach the class
Sales Items
Create sales item so you can assign them to the class you create
Global settings
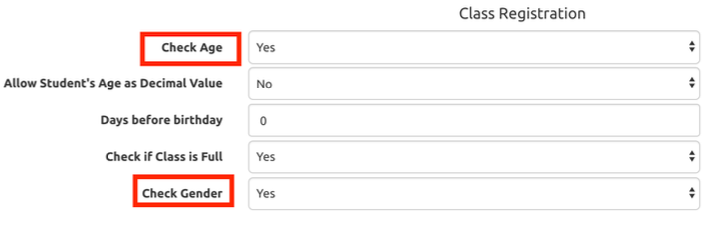
Turn on in “global settings” for “class registeration” all options that fit your program for who can register based on age and gender for class
Creating a Class
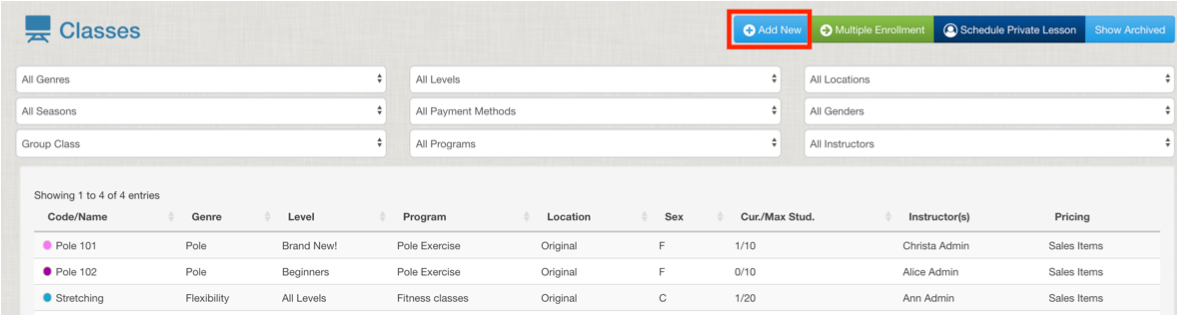
Go to the classes tab. Click “add new” to create a new class or click on any existing class and select “edit” from the menu that appears.
A pop-window opens or you can edit the same information on the “class details” tab of the class.
Type: select type of class (usually Group Class or Private Lesson)
Code/Name: What do you want it to be called on your schedule
Genre: Select from available categories
Level: Select from available categories
Program: Select from available categories
Location: Select from available categories
Rooms: Select from available categories (if you have enabled rooms in the global settings)
Students – Min and Max age = if you have set this as a booking requirement in the global setting it will check the age of the student before allowing them to register
Max in Class: standard number you want able to register in the class (you can edit the number by individual class when scheduling the actual class, this number is what will be autofilled)
Gender: If you select “male” or “female” and have set that as a booking requirement under general settings students will not be able to allow if the are not that gender. Co- Ed Allows both genders and non-binary if you have that feature turned on.
Payment Method: Set this to Sales Items (the other option is billing schedules, most fitness studios use sales items, but if you do billing schedules select that instead.)
Allow Unpaid Registration: if you select this you want specific memberships to be able to register without an active sales item; this is useful if you have members on monthly memberships and they want to register for a class in the next month before their membership has renewed. (Under “global settings” you can edit who can book unpaid via membership categories)
Allow Drop-in: leave unchecked UNLESS you are using a billing schedule payment method AND want to have a sales item drop in payment method.
Min Hours for Early Cancel: set a numerical value for how many hours someone must cancel for it to be “early”. If it is after that time, it will be listed as a “late cancel”. Check the box if it is NEVER possible to “early” cancel this class.
Prerequisite classes: if turned on you’ll be able to select how many other other class times fill the prerequisite.
If you select a single class and add 4, they will need 4 of that class to meet the requirement
If you add a second single class and 4, they will need 4 of BOTH classes to meet the requirement
If you add two classes at the same time and 4, they will need 4 total of either to meet the requirement
Online Class Registration:
- Open: Students can register
- Invitation Only: The admin goes to the class where they want to invite students via the “Add Student to Class” and chooses “Eligible” for the status to invite them.
- Member Categories: select which membership types can register.
- Closed: Students cannot register.
Main Instructor: Select default instructor (you can change this when you create the schedules). If you have turned on the “second” or “third” instructor option you’d pick those too at this time and all two or three would be on EVERY class scheduled unless you change it.
Allow Wait list: check the box to allow wait lists. It is a good idea to turn this on here and then use “seasons” to override to turn off when needed.
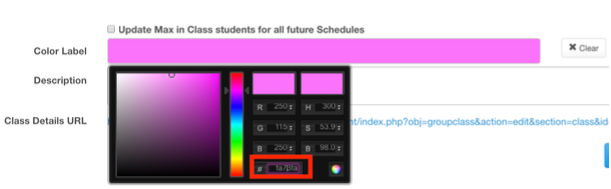
Color Label: select the class color. If you have a code you like, copy and paste it into other classes from the bottom set of numbers
 Description: type your description and save.
Class Details URL: after you save the class a URL will appear here, this is the direct link in the online client to ALL instances of this class.
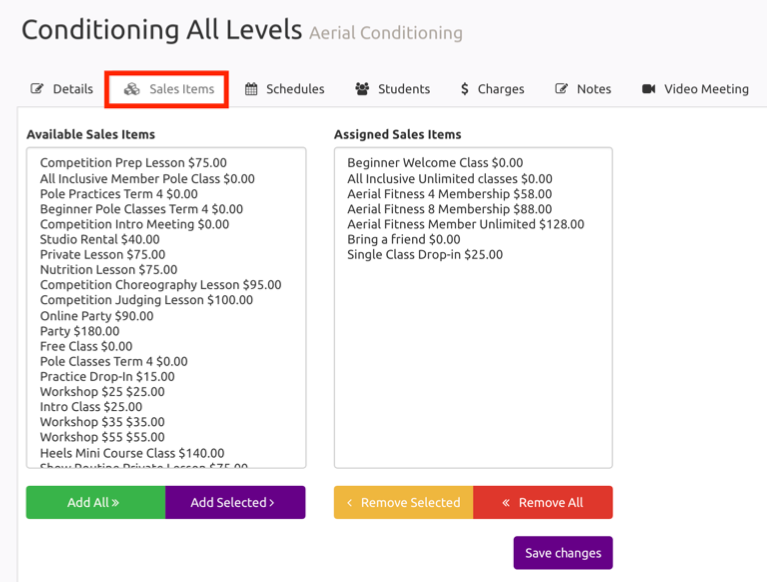
Assign Pricing options
From the class the class details page, go to “sales items” tab. Available items are on the left and assigned items are on the right. Move back and forth between lists then save.
Additional Tabs on Class Creation
Schedules: see existing schedules or the class and create new schedules
Students: see students who have registered for the class
Charges: who has been charged for the class and how much they have paid
Notes: see any notes that were assigned to schedules of the class
Video Meeting: start a online live video of the class