Online Private Lesson Booking
Fit Studio Manager allows direct online private lesson booking. This means the admin sets the times and classes types that can be booked on the back end, then the Online Client shows this for students to select and book.
Initial Settings Needed
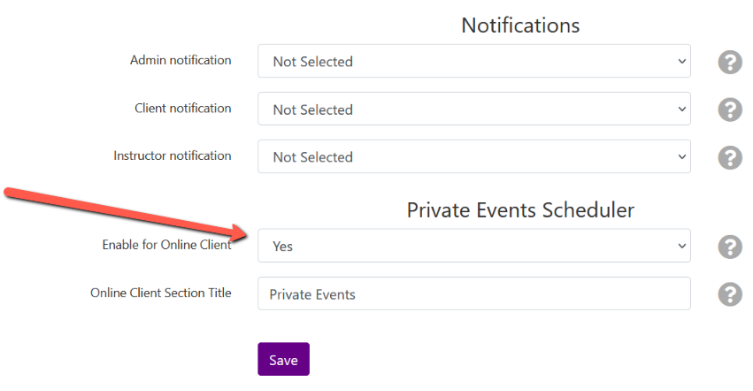
You need to enable the settings that allow for private events to be scheduled. Settings ⇾ Private Lessons ⇾ Private Events Scheduler ⇾ Enable for Online Client ⇾ YES. You can also change the “online client section title” to read whatever words you want to show to clients.
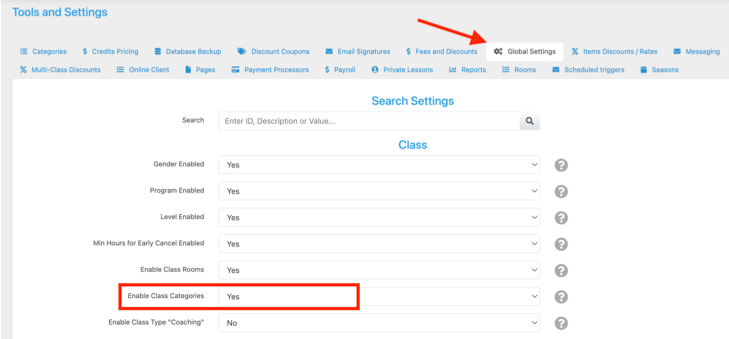
You also need to “enable class categories”. Settings ⇾ Global Settings ⇾ Classes. If you are NOT doing online private lesson booking, you keep this setting to NO. This is ONLY used for this specific feature as the very first filter in the Online Client for private online lesson booking.
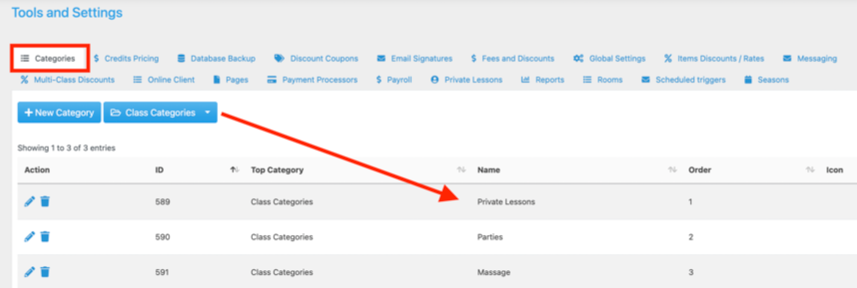
Create your categories types for your newly created “Class Categories”. These will show up as the first filter in the Online Client.
Create Sales Items
Create sales items that will pay for your online private bookings.
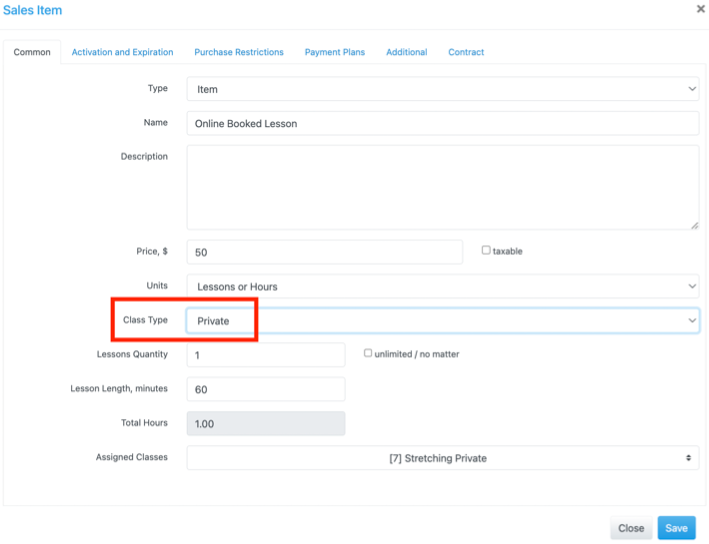
Name the sales item.
Under class type make sure to set this as “private”.
Set the duration.
Assign the classes it pays for.
Adding Instructor Availability
Creating Default Availabilities
At the bottom of the settings ⇾ private lesson you’ll see “Default Instructor Availability”. Add times you want to be able to quickly copy and paste to an individual instructor availability by clicking the Green +.
Then go to an instructor profile ⇾ default availability. Click the “load default instructor availability” button to pre-load all the times created in the Private Lessons page.

From there, instructors can also delete times by clicking the red x or add times by clicking the green +. These times will serve as the instructors default availabilities and should then be transferred to the calendar to be able to have them booked for lessons online.
Setting Weekly Times that will SHOW in the Online Client
From the instructor profile screen click the “calendar” tab. This open the weekly calendar that needs to be filled out with instructor availabilities to offer booking private lessons online. This calendar is what will be used by FSM to offer times for private lessons booked online for each instructor.
Click “copy availability” to transfer over what they created on the “default availability” tab to get started and have the default times autofilled for the week.
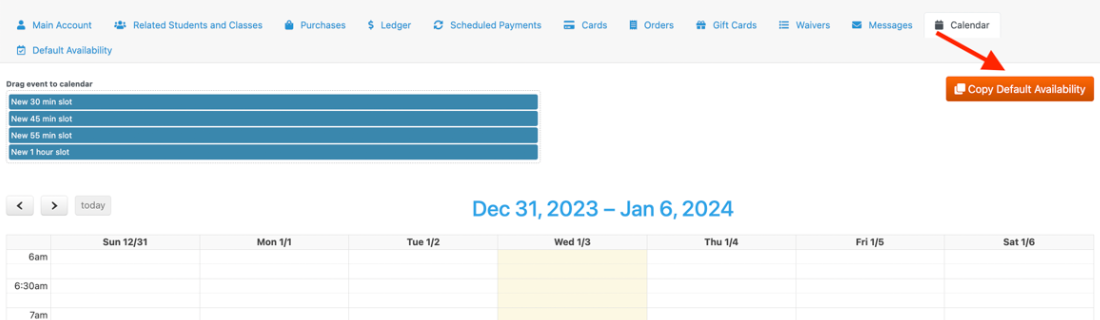
Drag and drop other times for the week to complete this calendar.
Reminder: The calendar runs by the week so they need to copy their default availability every week, this ensures that it times aren’t offered so far in advance that the instructor hasn’t selected as available.
Setting up the room for online class bookings
Settings ⇾ Rooms click the pencil icon to edit an existing room or click “add new” to create a room.
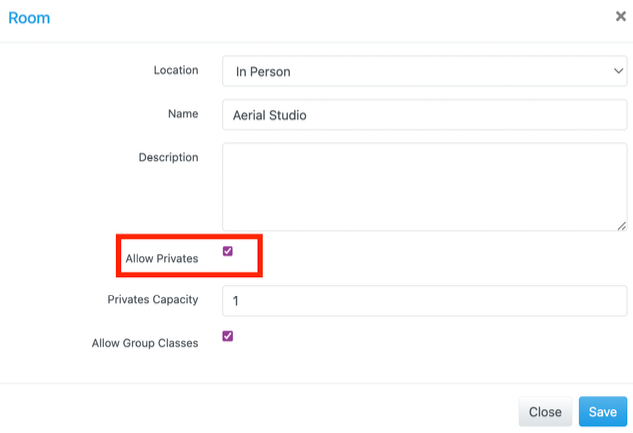
Make sure to click “allow privates” as online booking uses private lesson classes.
Change the number in “privates capacity” to the number of private lessons that can be scheduled in that room at any given time.
Check “allow group classes” that that room can also be used to schedule group classes.
Note: a group class and private lesson can’t be scheduled in the same class at the same time.
Creating the Class to offer Online
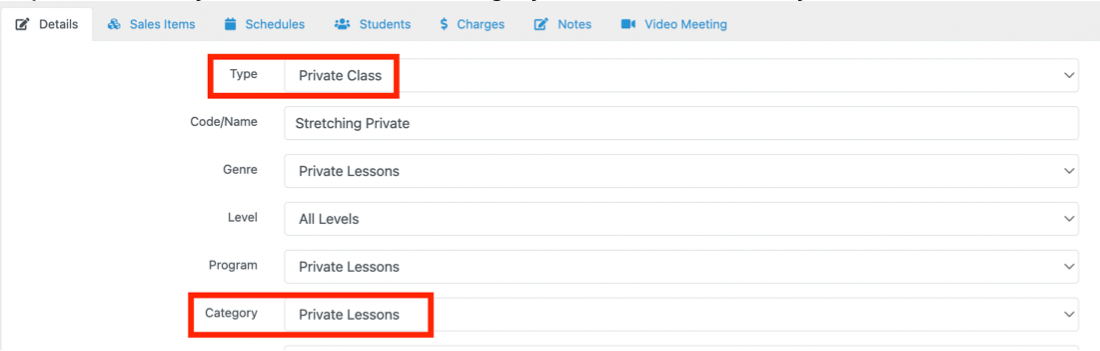
Class tab from the left menu; create the class you want to use for online private lessons. Make sure to use the class genres and programs you created to help find it easy. Also, IMPORTANT, make sure to change the type to “private lesson” as that activated this online booking feature.
Select the default room to the room that allows privates.
Imperative that you set the “Class Category” to one of the ones you created.
TIP: do NOT set class category for classes that you don’t want displayed in the OC Private Booking tab, just leave them blank so they don’t show up there!
Set the “instructor” to ALL instructors you want to have availabilities listed online.

Online Client View & Use
When a client is logged in they will then see the new “private lessons” tab to start the booking process.
First they will see the class category filter. Note: if you create the filter but don’t assign it to any class it will not appear, only the classes that HAVE the class filter selected will show here.
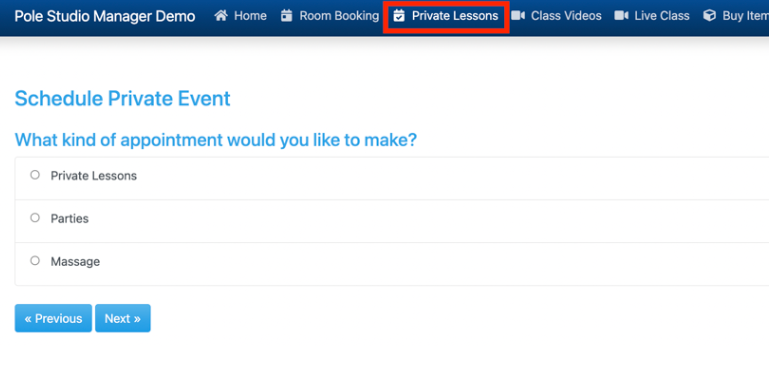
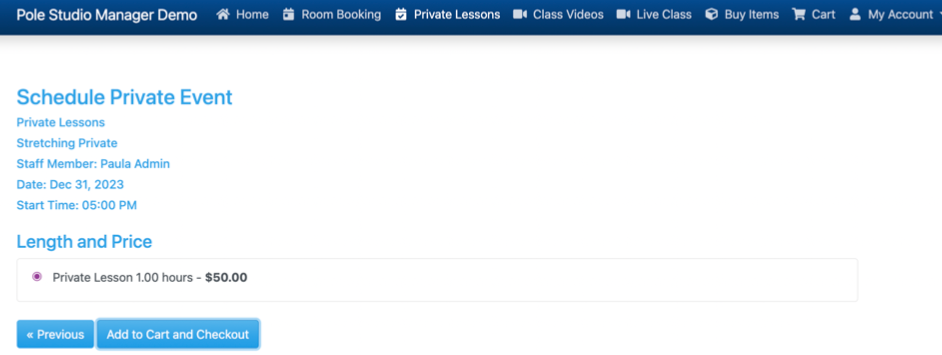
After selecting the “class category” they then see the class options to select.
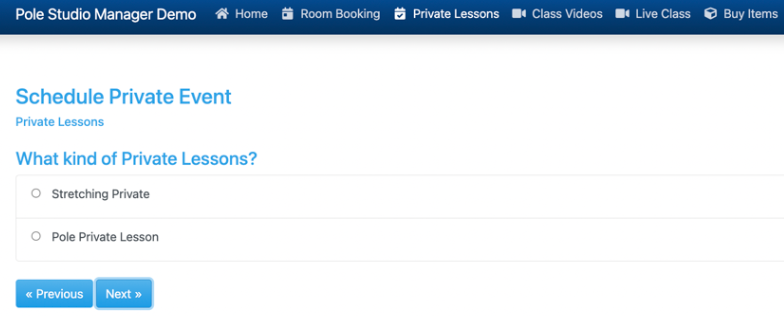
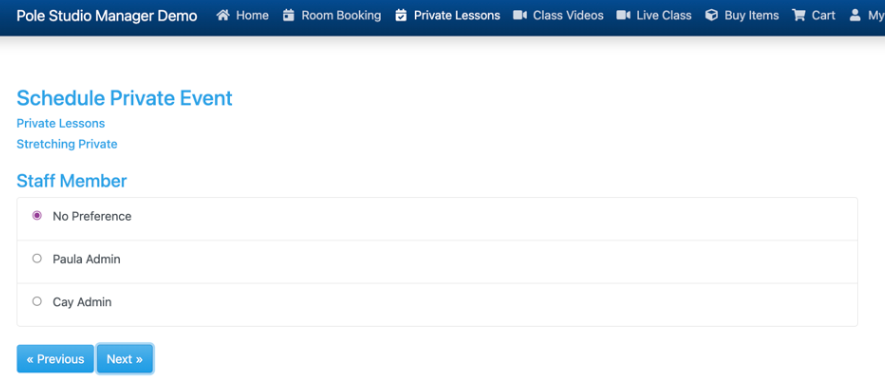
Then they select the instructor preference.
Then they select a general window of availability based on the instructor they picked availabilities set.
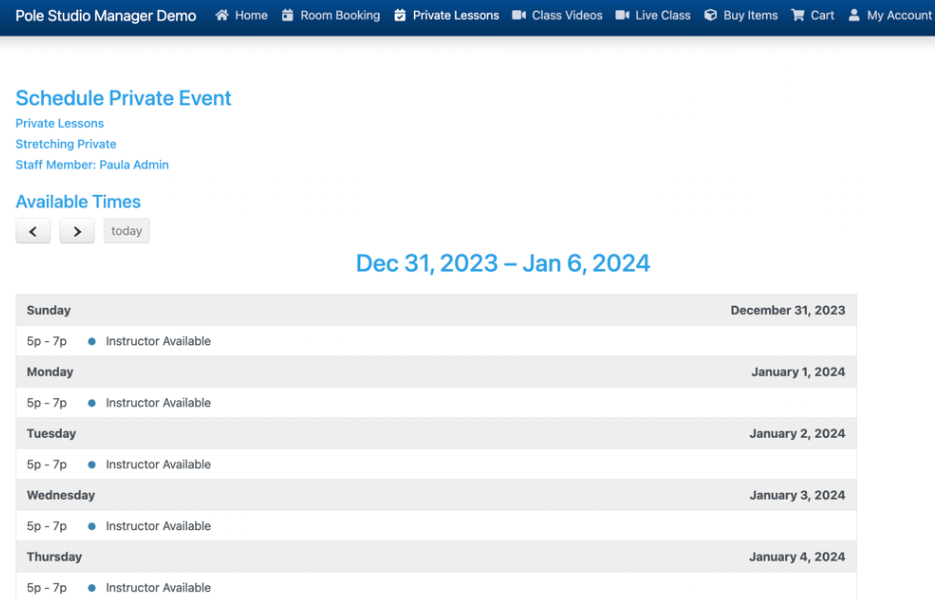
Then they select a specific time in that range.

Then they select the price option and check out.