Package
Packages allow you to bundle sales items together into a grouping for sale. This gives the student access to each of the items within the package.
Creating a Sales Item – Package
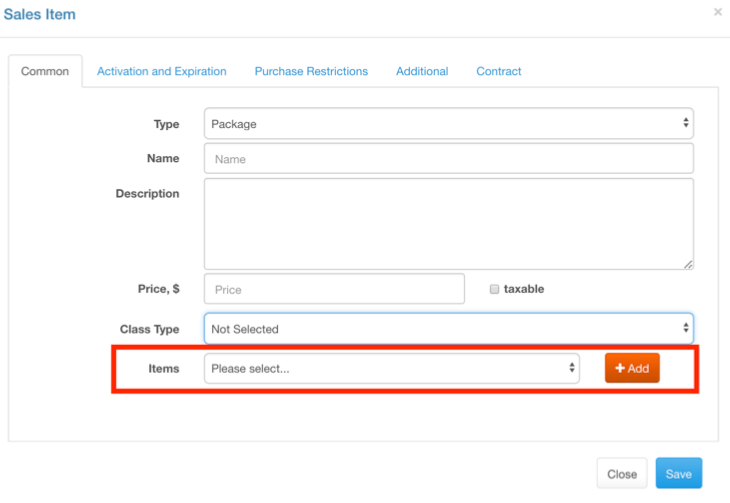
Go to “sales items” “Common” tab. Type = Package Name your item.
Add a description
Add a price. This will be the price for the package and will override the pricing on any individual items.
Check “Taxable” if you need to collect sales tax for this package.
Leave “Class Type” as Non Selected, it doesn’t apply here.
Items = select and “add” all the sales items that you want included in this package. Any previously created sales ITEM can be added. Products cannot be added, only ITEMS.
Activation & Expiration
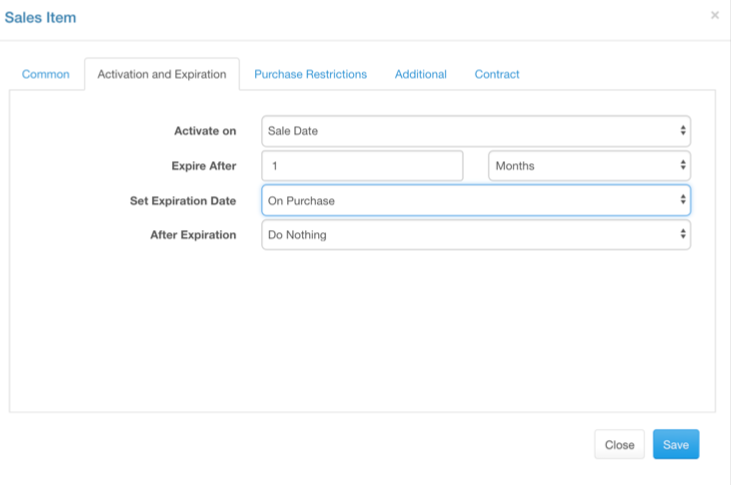
Activation & Expiration dates set for the package will override those of the Individual sales items.
Activate on = when will this sales item be able to be used.
Sale date = when it is sold
First Visit = is when they first attend your studio after purchase
Selected Date = Specific date you set
Expire After = when will this item no longer be able to be used
Set Expiration Date = when is the expiry date set? At the time of purchase or at the first visit after purchase?
After Expiration = does this item expire or auto renew
Auto renew will automatically sell the same item to the student as many time as listed until cancelled
Tip for auto renew: set to a high number unless you are confident you do not want to renew after that time. For example, for a monthly membership that is a year in duration consider setting to 99 instead of 12 unless you plan to renew, resign a contract and make any changes after the year. It is easier to cancel then create an auto renew.
Purchase Restrictions
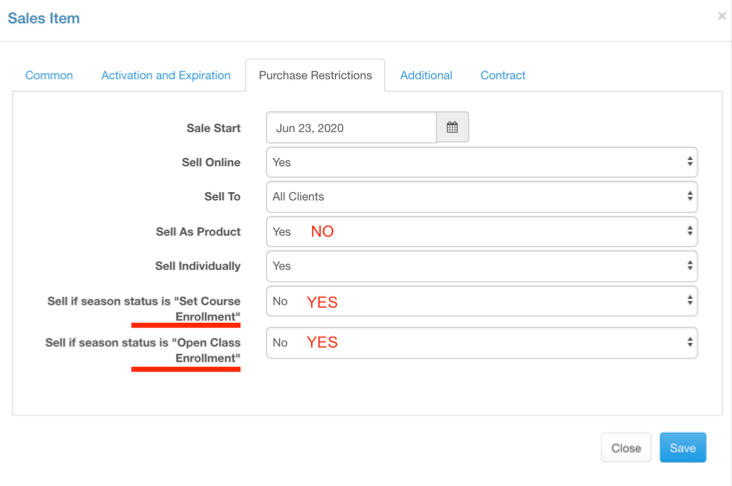
Sale Date = when you want it available for sale. Set today’s date if unknown.
Sell Online = yes or no
Sell To = change this to “new clients only” or a specific membership category if you want to limit who can purchase it.
Sell as Product = No, this allows the item to be listed as a product instead of a service.
Sell Individually =
Sell if “Set Course” = should be YES. If a “season” enrollment is set to “set course enrollment” then this product will be available for purchase. Only set to no if you want to limit when it can be purchased based on the “season”.
Sell if “Open Class” = should be YES. If a “season” enrollment is set to “open class enrollment” then this product will be available for purchase. Only set to no if you want to limit when it can be purchased based on the “season”.
Additional
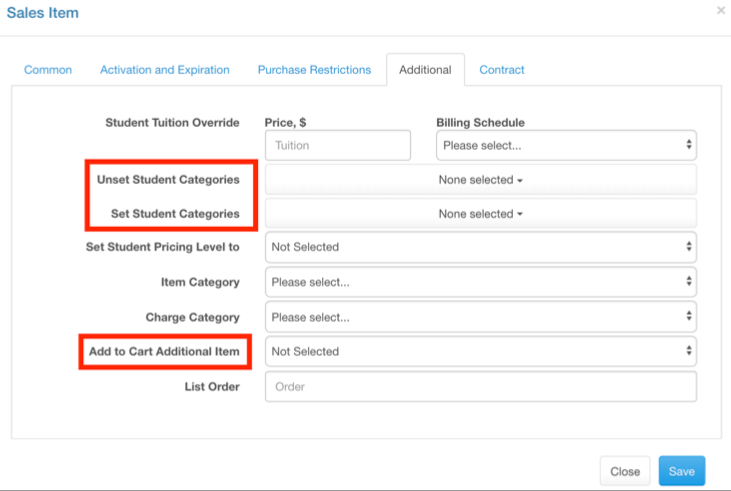
Ignore everything related with student tuition override at the top of this section.
SET your Membership category! If you want to unset or set a member category in relation to this purchase item you can do that here. It is recommended to set your membership category for the package with THIS (creating the package) and not with individual sales items since the package is where the money is collected.
Set Student Pricing Level = if you want to create a separate student pricing level you would set it here. It is easier to use membership discount settings instead.
Item Category = select the category that you want it to appear when filtered in the shopping cart.
Charge Category = select the category you want money from this sale to appear in reports
Add to Cart Additional Item = if there is a second item that ALWAYS goes with this product you can add it here to have it automatically added to the shopping cart together.
If creating an auto renewing membership that has a one time registeration fee, you would add the registeration fee HERE so it is added to the cart a single time but then is not part of the auto renew.
List Order = how close to the top or bottom of the shopping cart options you want it to appear
Contract
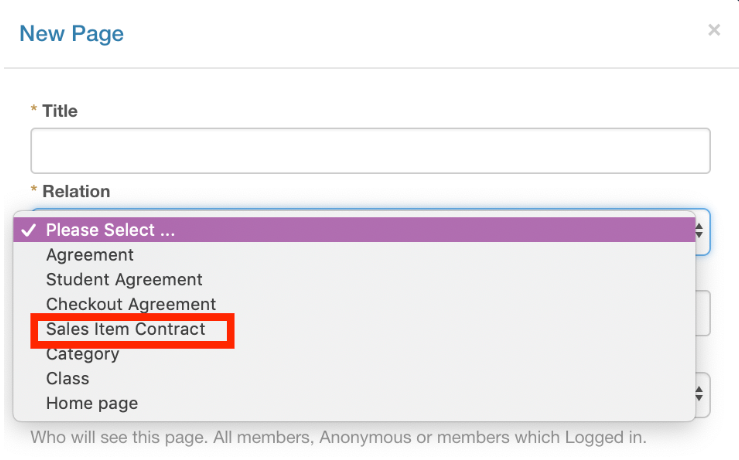
Create a contract, if desired for the item, in “Settings” ⇾ “Pages” then attach it here.
When creating the contract in “Pages” you’ll want to set it as “Sales Item Contract”.
Also decide if you need a full signature for the contract when creating it in “Pages”.
Important things to remember with Packages!!!
The class registeration details you set for EVERY sales ITEM individually in this package will apply for that item still. For example, if you want the package to register someone for the “same day and time” over a season you need a sales ITEM in the package that was set for “Available quantity of schedules in selected season (same day and time)”.
Assigning a sales item to a class happens via the ITEM, not the package. If you want the package to pay for a class you need a Sales ITEM that pays for the class in the package.
Sales Item – PACKAGE Page 3 of 3