Pages (Extra Text options)
FSM has a setting area called “pages” where you can enter text to appear in different areas of the software. This includes your contracts as well as your waivers and agreements as well as ways to add extra text in specific places.
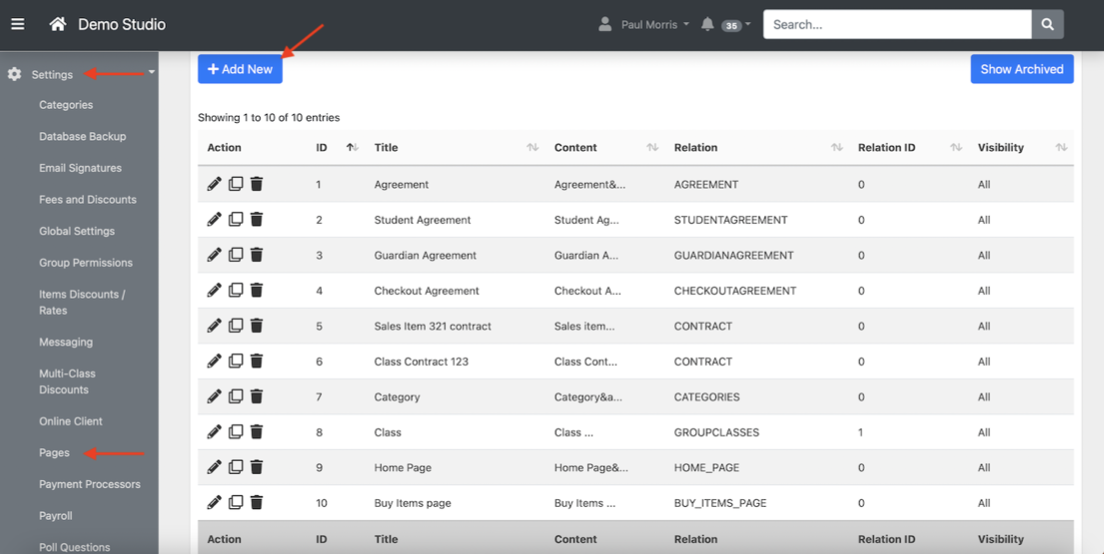
Before you can use any of them in the system you first create them in the pages area.
Settings ⇾ Pages
This document will explain what each “relation” does, for the extra text options
Pages – Basic Settings
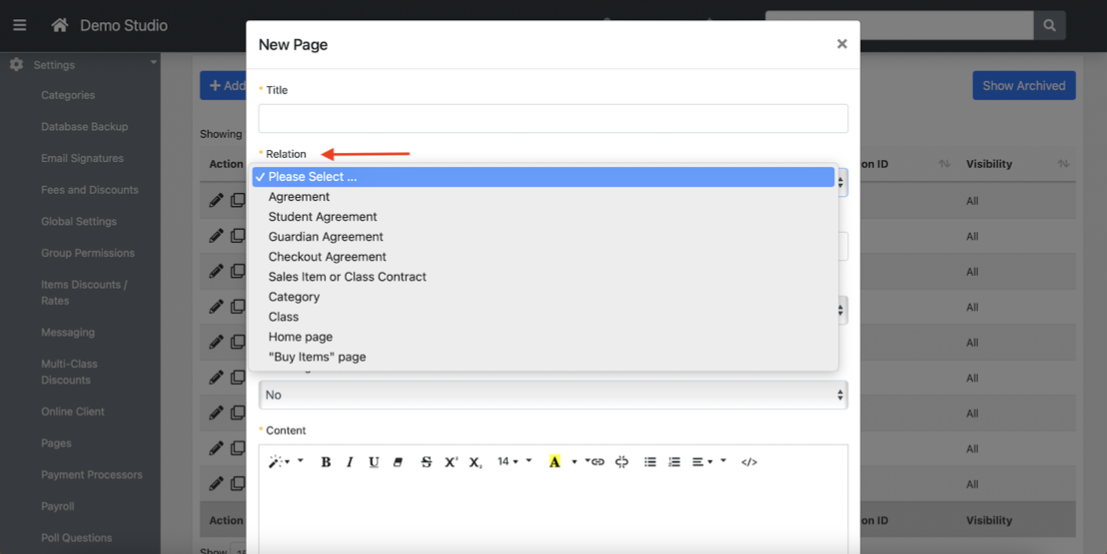
Title
What your pages will be called in the system, this will be visible to students too.
Relation ID (optional)
This is only used for the “extra text” options and is going to be a Class ID, Category ID, and maybe some other numbers assigned to FSM entity. Enter an ID here to have the additional text show in relation to that class ID in the Online Client, etc.

Visibility
Drop down option that controls who will SEE this text on a page in the Online Client.

ALL – is the most common setting and will show to EVERYONE.
Anonymous – FSM can be configured to sell some some items to not registered persons, without a FSM account and the usual registration process (for example tickets for events). So we can add special waiver assigned for this type of purchase.
Logged in – will only show the text (this is for the text pages and not for waivers/ agreements/contracts) when someone is logged in to their FSM account.
Need a Signature
This box only applies to agreements and waiver so will always be left NO for extra text options.
Text Box & Formatting
Use the large box to put the text for your pages document. Use all the options at the top for formatting.
Then “save changes”. Please note that saving pages (especially when editing one that was previously saved) takes a WHILE as the system has to add icons or attach to different places in the system.
Extra Text for Explaining
Sometimes you just need more words! There are a number of pages functions that allow for extra text to show up in the Online Client.
Class
Add more description for a class after the initial description from the creation of the class with this pages.
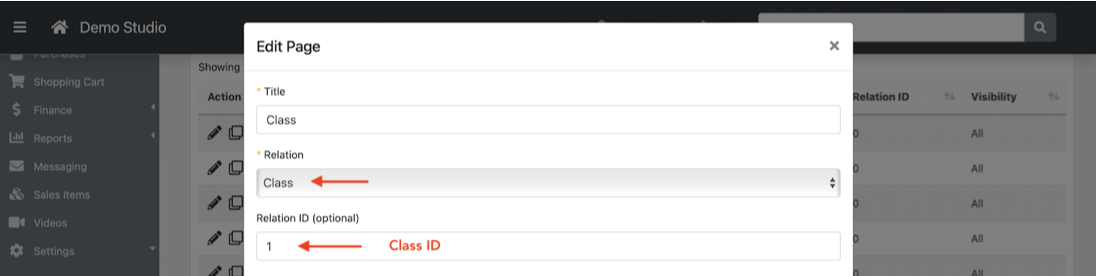
This is where you want to USE the “relationship ID” and add the class # you want the class description to populate for. Then the text will appear on class registration popup window or class page.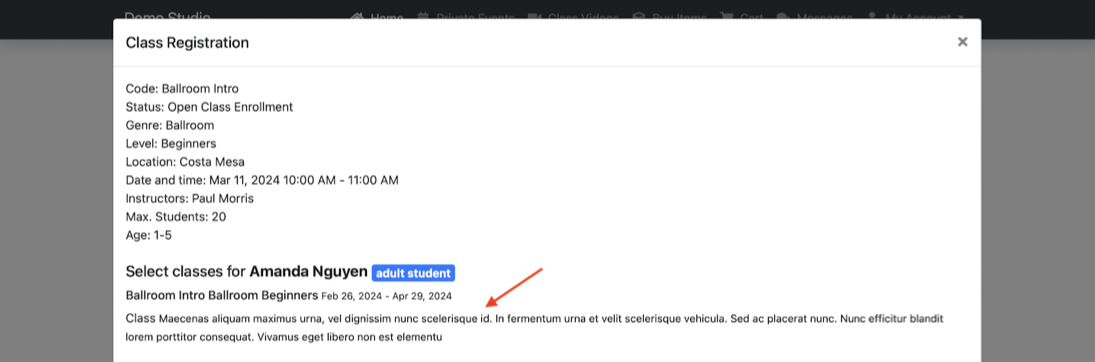
Category
When using the category tabs on the Online Client, this text will appear at the top.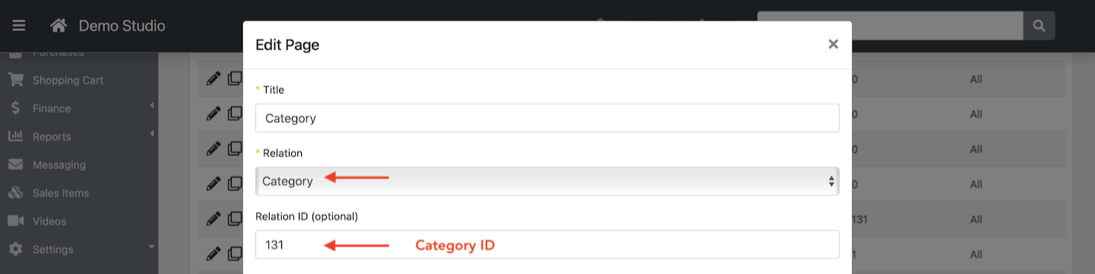
This is where you want to USE the “relationship ID” and add the category # you want the description to populate for.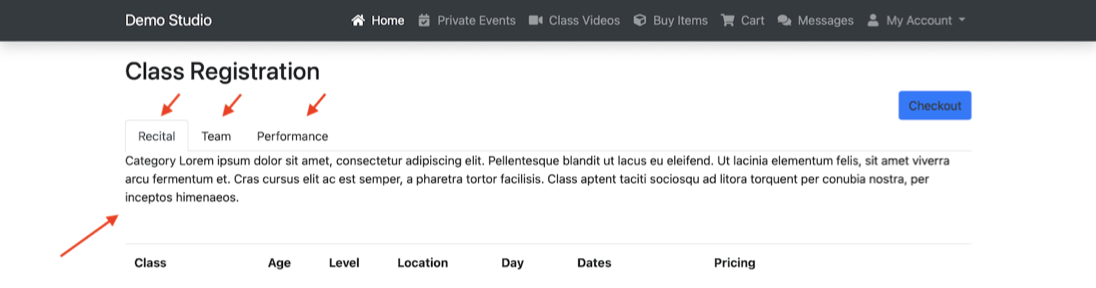
Home Page
Configure this pages option to customize the text on your home page of FSM.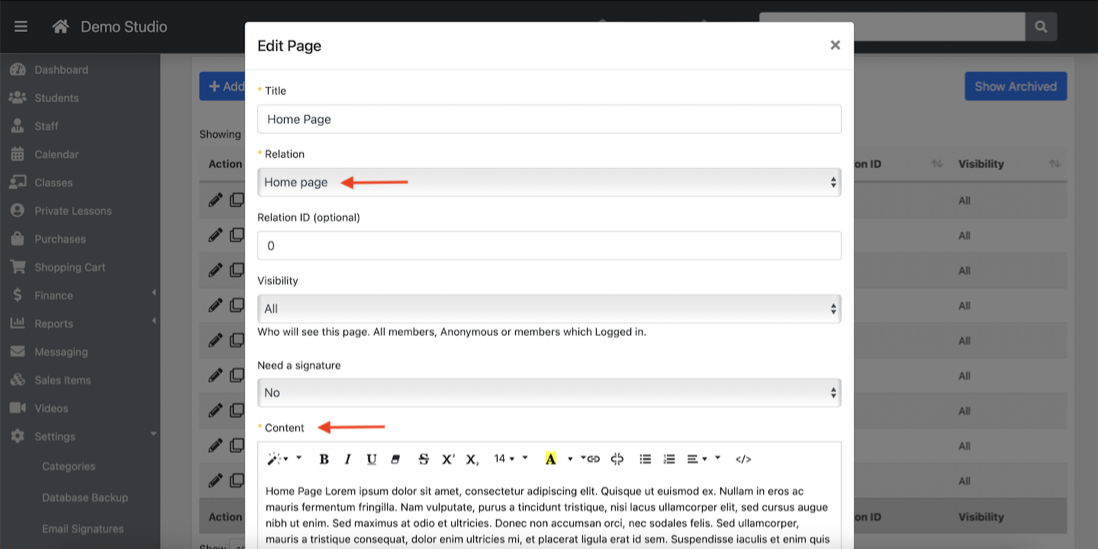
Then when a student clicks on HOME PAGE in your online client, the text saved here will appear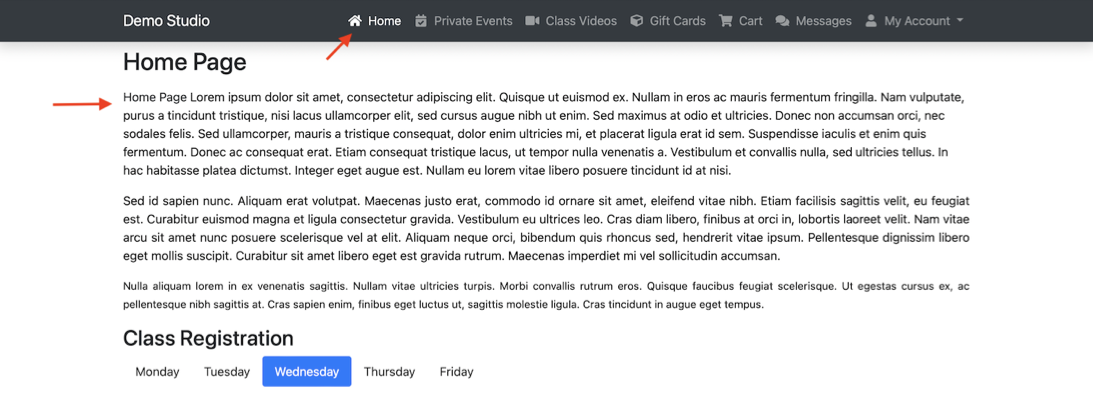
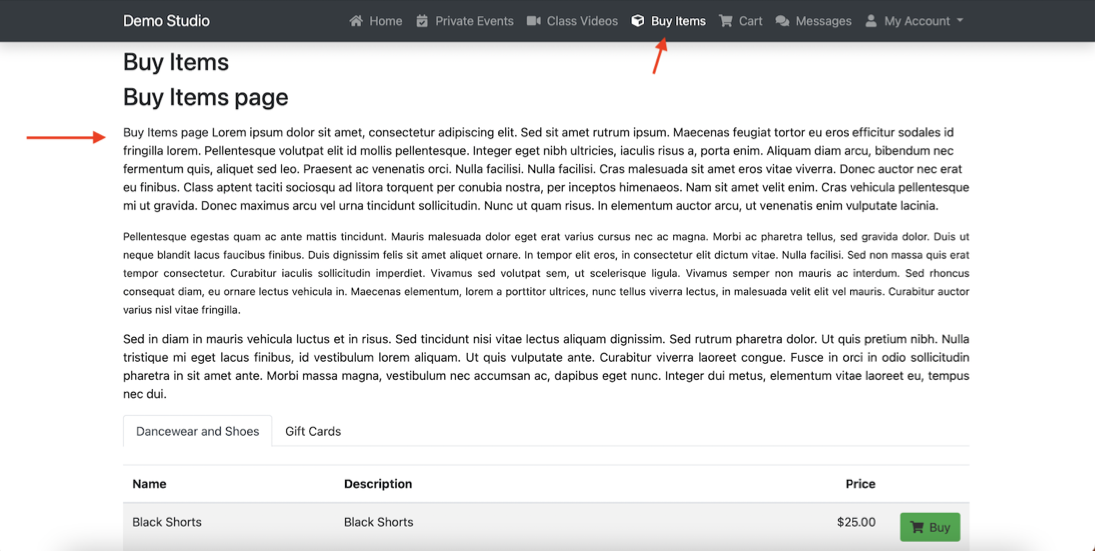
“Buy Items” page
Configure this pages option to add text to your “buy items” section of the online client.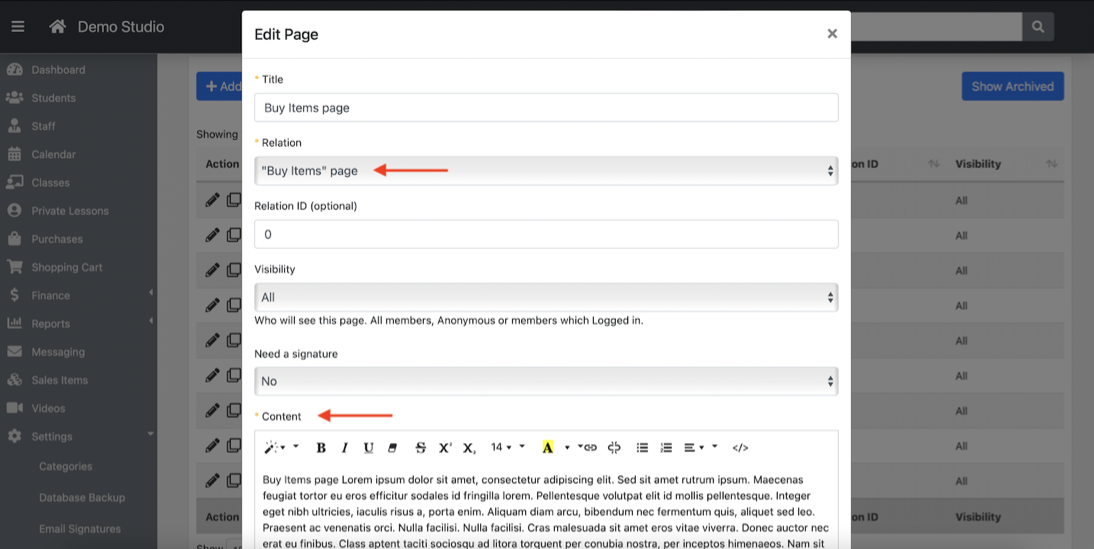
Once created it will appear at the top of the “buy items” page.