Payment Plans in a Sales Item
Payment plans can be made for any purchase directly from the admin shopping cart but these don’t have contracts attached and students can’t create them. Add a payment plan to a sales item for the student to be able to select it and sign a contract with repayment terms directly in the Online Client or App.
Create Contract
If you want the student to sign a contract for the payment plan, this would be in addition to any contract for the sales item (meaning you can have one for the overall sales item with the terms for it AND one for the specific payment plan, both signed at check out), go to pages and create the “Class & Sales Item Contract”.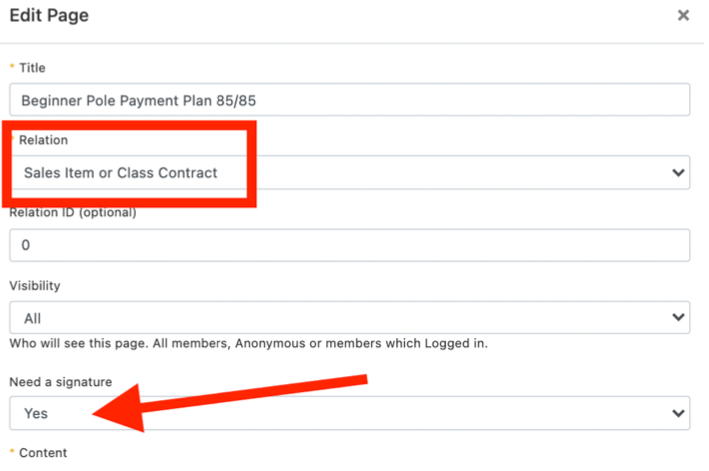
Title ⇾ name the payment plan contract so you can find it when creating the sales item
Relation ⇾ Sales Item or Class Contract must be set
Need a signature ⇾ Yes so you have an electronic signature of their agreement to the payment plan.
Then fill in the content with the text of your payment plan and save changes.
Create Sales Item
Next create your sales item following all the steps and SAVE it. A sales item must be created and SAVED before you can then go back (by clicking the pencil icon next to it) to add the payment plan.
Create Payment Plan Options
Reopen your sales item and go to the Payment Plan tab.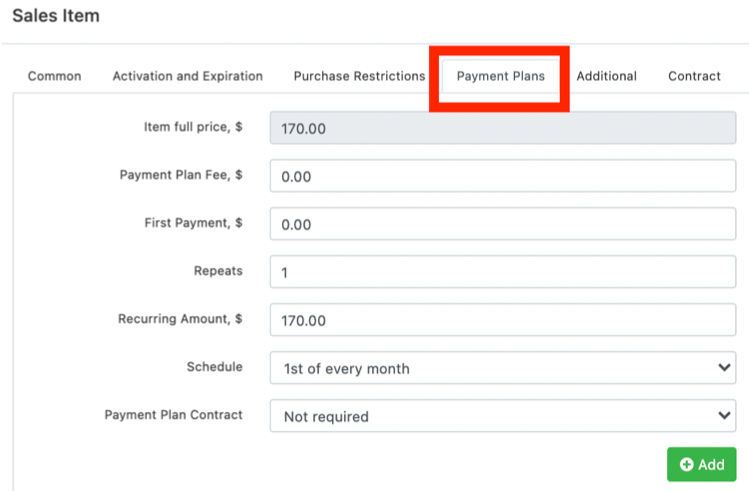
The full item price will be listed and greyed out, it cannot be changed here.
Payment Plan Fee = if you want a fee paid when the payment plan is taken out enter it here. This will be added to the first payment amount.
First Payment = amount of the first payment enter here (which does NOT have to match other payments)
Repeats = how many additional payments after the first you want.
Recurring Amount = will update and subtract your first payment, then divide by the number of repeats. (FSM does the math for you!)
Schedule = set the schedule for how often you want the repeated amounts to come out.
Payment Plan Contract = add the contract you created if you want the student to sign a contract agreeing to the terms of the payment plan.
Add = click the green ADD button on the right to add the payment plan as an option.
After the payment plan is “added” you’ll see it populate below:

Click the red X to delete a payment plan.
Payment plans cannot be edited, just delete the one you want to edit and re-create it.
You can create as many payment plans as you want for a sales item.
After you have created all payment plans click SAVE at the bottom of the window. Do not close out via x at the top of your work will not be saved!
Payment Plans Visible in the Online Client
Once you’ve created the payment plans in the sales item, they will be live in the OC and APP.
After a student has logged in, they will select “Book Now” next to the class that has the payment plan. Then all the options for payment will populate. Under the sales item that has the payment plan options, they will be indented in. You’ll see the “pay in full” option then the payment plan options nestled under.
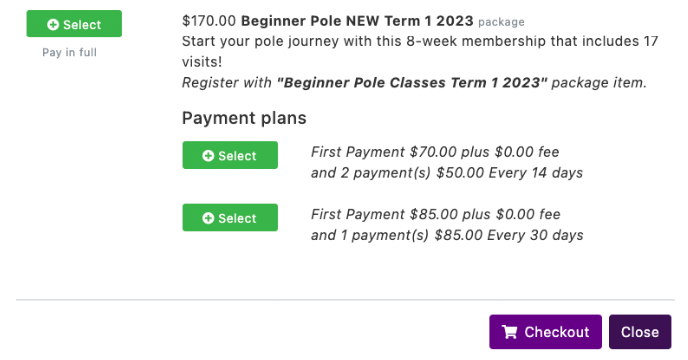
Click the green select button for the chosen option. Then select “check out” to pay.
On the checkout screen you’ll see the first payment in the cart to pay and the details of the payment plan.
You’ll also see the payment plan contract (this example also has a general sales item contract so you see both) to sign before completing the checkout.
Upon check out, the first payment is collected, the student is registered for the class/season, the signed contracts are now in the student’s waiver section, and the scheduled payments are made as per the plan.