Sales Item
Sales Items are used for all classes, lessons, and services. Create these items individually to put them in a package later.
Creating a Sales Item – ITEM
Go to “sales items”
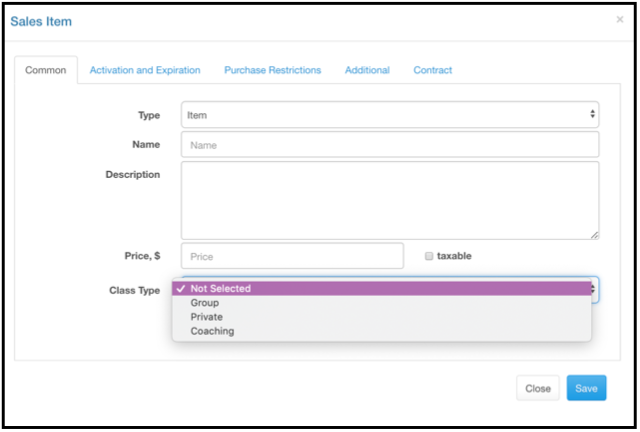
Under the “common” tab the default type is Item, make sure that is selected.
Name your item.
Add a description
Add a price
Check “Taxable” if you need to collect sales tax for this item.
Class Type = for which type of service will you use this lesson?
Class Type Group = are your normal multi-person classes. After you select this you’ll then add “lesson quantity”. How many lessons? Until they expire or per week? If it is unlimited, check that box.

Class Type Private = is for lessons that are calculated by the hour. Enter how many hours (.25 for 15 minutes, .5 for 30 minutes, 1 for 60 minutes) the item covers.

Class Type Coaching = is another type of lesson calculated by the hour and is often with other students like a small group training. This isn’t used in Pole & Aerial often.
Activation & Expiration
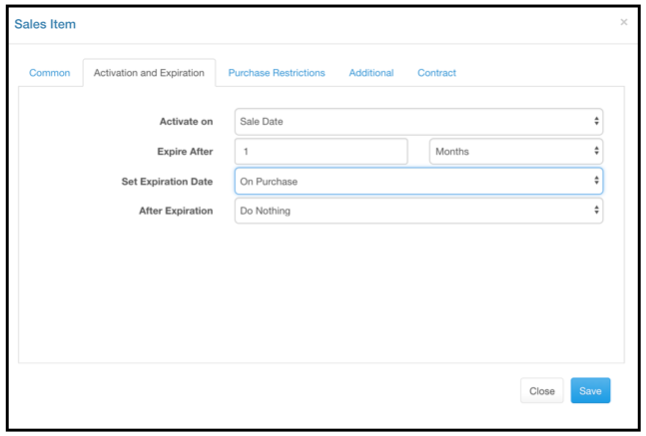
Activate on = when will this sales item be able to be used.
Sale date = when it is sold
First Visit = is when they first attend your studio after purchase
Selected Date = Specific date you set
Expire After = when will this item no longer be able to be used
Set Expiration Date = when is the expiry date set? At the time of purchase or at the first visit after purchase?
After Expiration = does this item expire or auto renew
Auto renew will automatically sell the same item to the student as many time as listed until cancelled
Purchase Restrictions
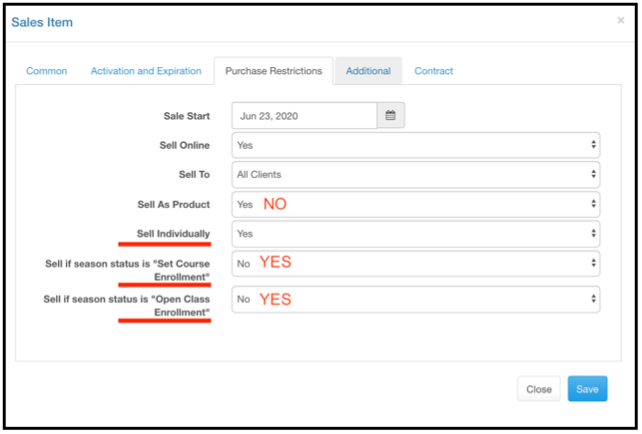
Sale Date = when you want it available for sale. Set today’s date if unknown.
Sell Online = yes or no
Sell To = change this to “new clients only” or a specific membership category if you want to limit who can purchase it.
Sell as Product = usually No, this allows the item to be listed as a product instead of a service.
Sell Individually = if you are going to have this be included in a package and also want it to be available for purchase a stand alone item.
Sell if “Set Course” = should be YES. If a “season” enrollment is set to “set course enrollment” then this product will be available for purchase. Only set to no if you want to limit when it can be purchased based on the “season”.
Sell if “Open Class” = should be YES. If a “season” enrollment is set to “open class enrollment” then this product will be available for purchase. Only set to no if you want to limit when it can be purchased based on the “season”.
Class Registration Details on Additional
The first option on the “additional” tab when you’ve selected “Class Type Group” on the “common tab” is “Class Registeration”, this is how your item will be used during class sign-up.
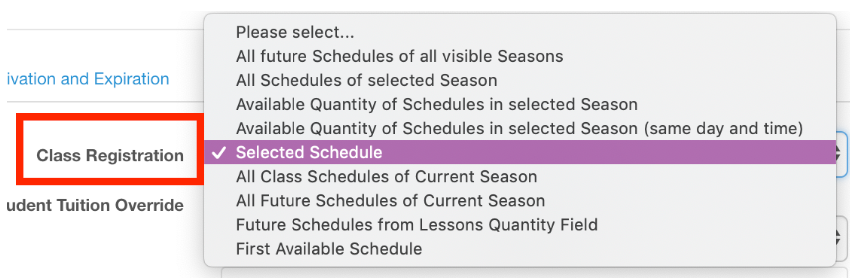
All future schedules of all visible seasons = This option means that the student will be added to all future lessons for all seasons that are marked as “Visible” (seasons where “Visible for Client” is set to “Yes”)
All schedules of selected season = If student selected some class schedule from “Season A” she will also be added to all other schedules of this class in “Season A”.
Available quantity of schedules in selected season = “Available quantity” means “Lessons Quantity” field that is set for this sales item. For example if “Lessons Quantity” is set to 6 then student will be registered for six lessons of season selected (starting from Season start date).
Available quantity of schedules in selected season (same day and time) = student will be registered only for the same day and time for the entire season. (Set Season status to “Set Course Enrollment”)
Selected schedule = the student will be scheduled only for the (one) lesson they selected. (Set Season status to “Open Class Enrollment”)
All Class schedules of current season = Student will be registered for all classes in season selected
All future schedules of current season = Student will be registered for all future schedules (lessons) of the season that in selected in Settings ⇾ Seasons as the Current Season.
Future schedules of lesson quantity field = If “Lesson Quantity” for sales item is 6 than the student will be registered for the next six future schedules (lessons).
First Available schedule = If class is scheduled for today but class is full and tomorrow there are are openings, the student will be registered for tomorrow.
Additional
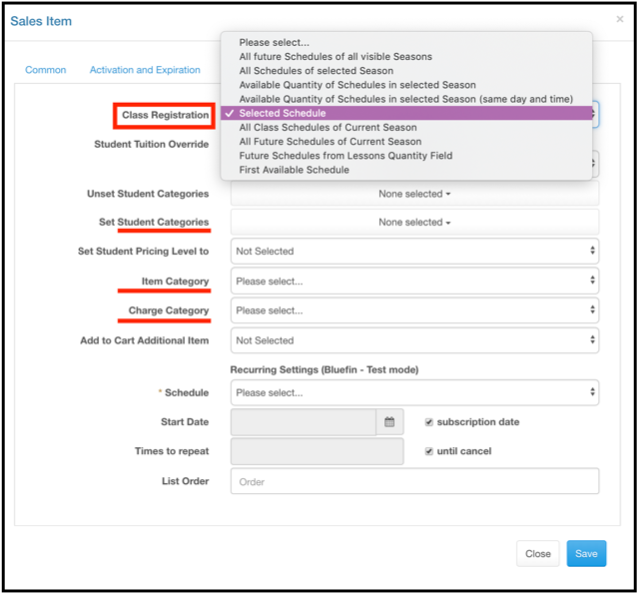
Ignore everything related with student tuition override at the top of this sections and recurring settings at the bottom.
If you want to unset or set a member category in relation to this purchase item you can do that here. If a sales item is going to be part of a package only, it is recommended to set the membership category in the package instead of the sales item.
Set Student Pricing Level = if you want to create a separate student pricing level you would set it here. It is easier to use membership discount settings instead.
Item Category = select the category that you want it to appear when filtered in the shopping cart.
Charge Category = select the category you want money from this sale to appear in reports
Add to Cart Additional Item = if there is a second item that ALWAYS goes with this product you can add it here to have it automatically added to the shopping cart together.
List Order = how close to the top or bottom of the shopping cart options you want it to appear
Contract
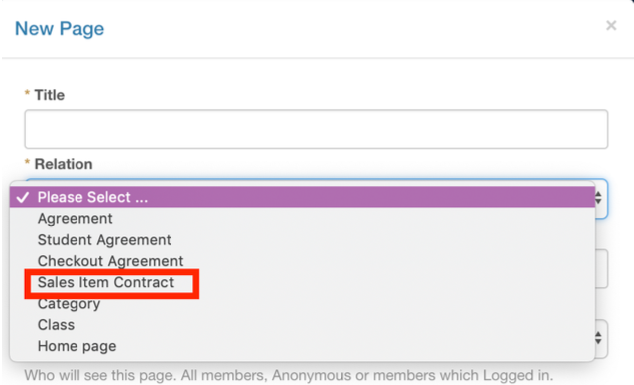
Create a contract, if desired for the item, in “Settings” ⇾ “Pages” then attach it here.
When creating the contract in “Pages” you’ll want to set it as “Sales Item Contract”.
Applying the Sales Item to a Class
Creating a pricing relationship between a sales item and class lets the software know what item can pay for what class. There are two ways to create this relationship in PSM.
Apply Sales Item via the Sales Item Page
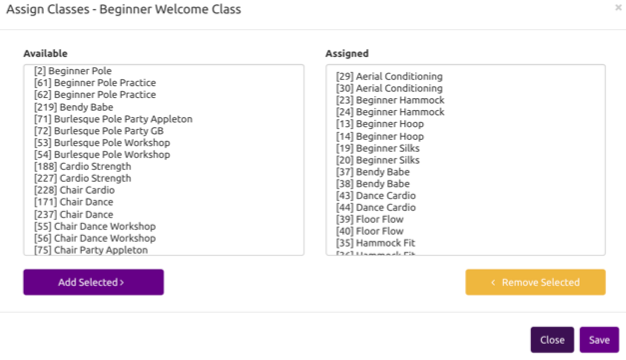
When on the “sales item” list you can click the whiteboard to add the classes that particular sales item will pay for.
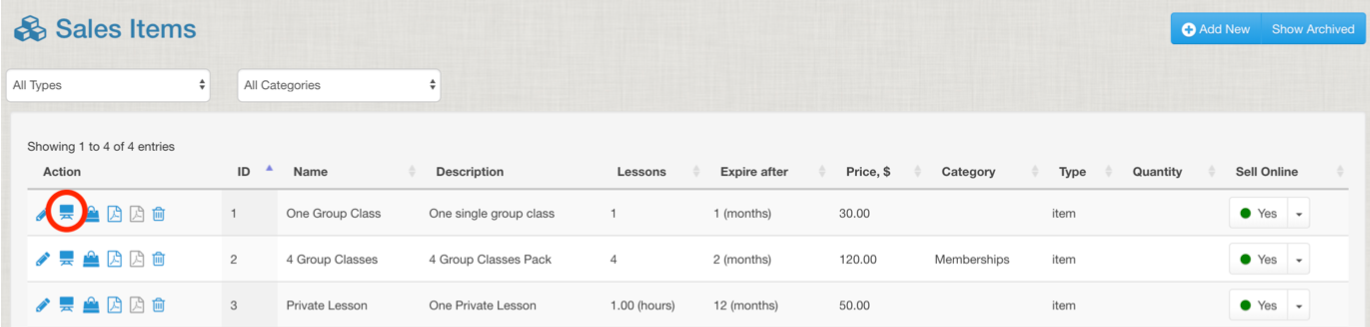
A pop-up will open with the classes available on the left and the classes already assigned to the pricing option on the right. Move classes between the two lists and save.
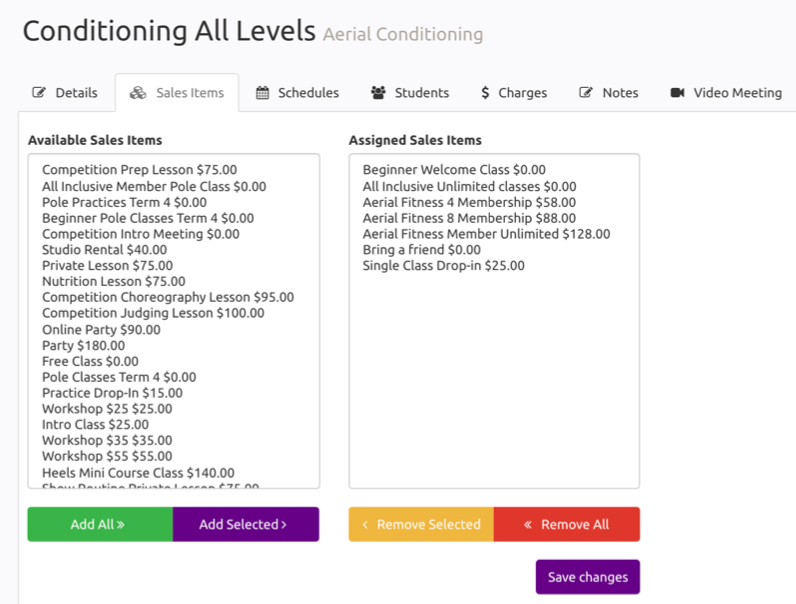
Applying Sales Item via the Class Details Page
From the class details page, select the “sales items” tab. The sales items possible are on the left; sales items already assigned are on the right. Move sales items between the two lists and save.