Scheduling a Class
Once you have created the class you will need to set up individual schedules of the class type that students will then be able to register for. There are two ways to create classes in FSM. To access both go to the “class”, then “class details” and select the “schedule” tab.

Make sure you have created your SEASON first before scheduling a class! Reminder that whatever setting you have under “seasons” and “current season” is the season that will auto-populate when scheduling classes.

Multi Class add
Need to add multiple examples of the same class on the same day at the same time? This feature saves to TON of time.
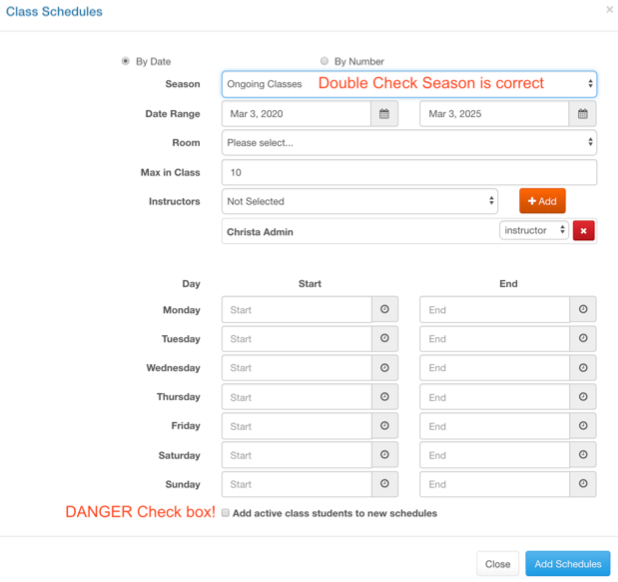
The season and corresponding date range will be auto filled.
IMPORTANT to double check the season since that is what controls the date range and if you have an ongoing season with a wide date range that is lot of classes you may have mistakenly scheduled.
Max in Class and Instructor will all be autofilled from your class set-up.
Change what you need to in the upper settings.
Then put in ALL days and times. Yes, Monday at 6pm and Tuesday at 7pm can all be scheduled in one click.
Danger! if you click the checkbox “add active” students will will add all students who have taken this class and have a current membership to ALL the classes you are about create….this is likely NOT what you want.
Single Class
Add a “single class” if you only need one instance of the class.
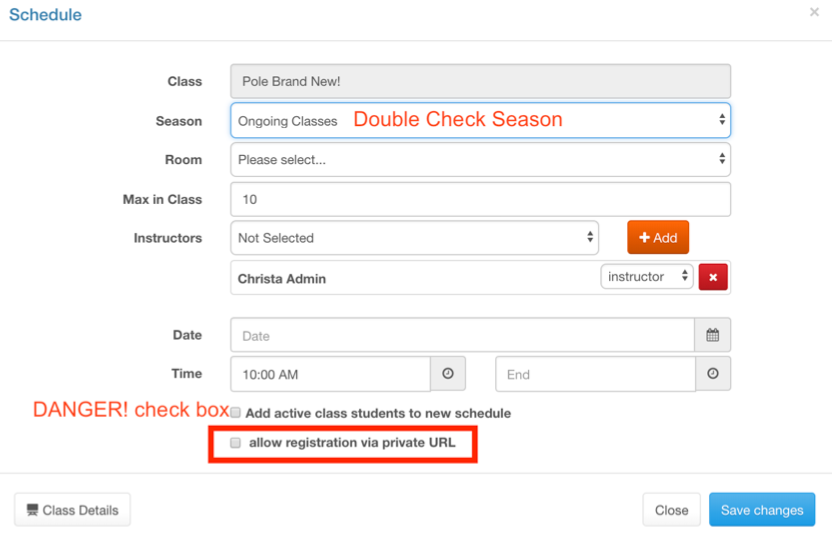
The season and corresponding date range will be auto filled.
IMPORTANT to double check the season since sales item behavior from “class registeration” will likely be tied to it.
Max in Class and Instructor will all be autofilled from your class set-up.
Change what you need to in the upper settings.
Select date and time.
Check box for “add active
students to new schedule” can be selected if you want all students who have EVER registered for the class type who have current memberships be added to this class. (You can view who this would be on the “students” tab for the class)
Allow Registration Via Private URL: select this box ONLY if you want students to be able to register for this class with a direct link and NOT PAY. Currently this is used for parties where one person has paid the cost of the event and then everyone else is able to register but not pay. The private url is a direct link with a shortened registration process.
Direct Link to Class
After a schedule is saved, a direct link is created. All individual schedules have a direct link you can send someone to to register that is NOT the “private URL”. The direct link sends them to the online client with all the sales item possible for that class. This like is available to copy from the edit window of every schedule.
![]()
Editing A Schedule
Once you have created a schedule there are multiple easy ways to edit it.
Editing from the Class Schedules List
You can edit any single class from the “class schedules” list for the given class. Click the pencil icon to open the scheduling edit window.
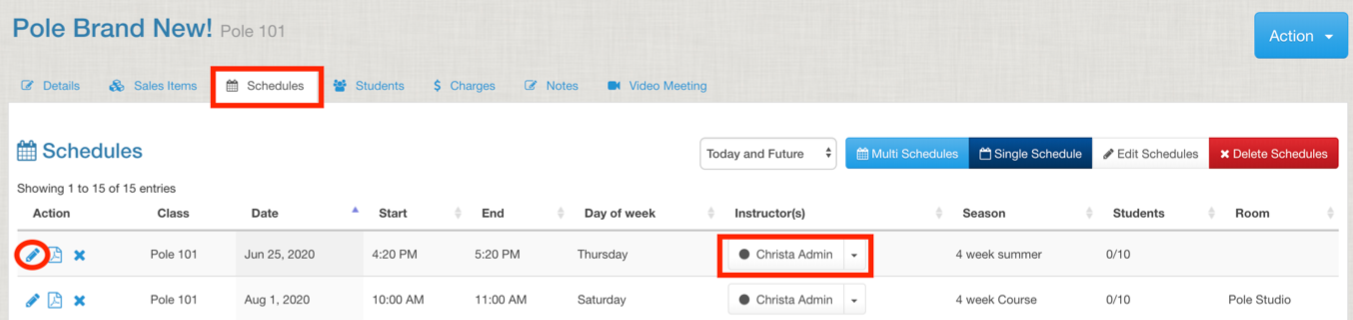
If you need to substitute an instructor you can do that without even opening the schedule editing window but changing the instructor in the drop down menu in the list.
Editing from the Daily Class List
From you staff calendar you click the white space on any day to access the daily class list. Click on the name of a class and you’ll be able to add students, take attendance, start an online class video, or edit the schedule.
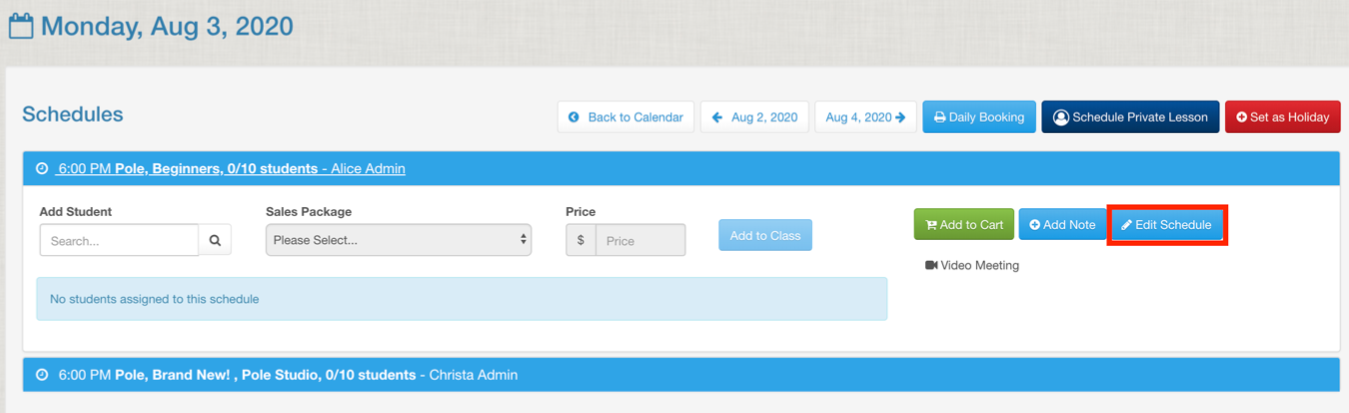
Click on “edit schedule” and the scheduling edit window will open.