Inventory
FSM has an inventory system that allows you to track inventory sold, as well as amount of inventory on hand.
Group Permissions
The first step is to make sure that all the inventory settings are turned on in “group permissions” for the staff logins that you want to be able to deal with inventory. For each group, turn on the following.
⇾ Set-up

The upper level gives the user permission to see the inventory stock page and make changes. This is the sub-menu in inventory that can only be access from the main inventory tab.
The second menu the user permission to see the overall inventory list and make changes. This is the main inventory tab.
⇾ Set-up ⇾ Settings
![]()
Check this box in each user profile you want to have permission to be able to add sizing or color categories, make sure to tick this permission.
⇾ Report
![]()
Ticking this box under group permissions allows the user to access the inventory sales report.
Log out and log back in to see the new group permissions.
Create Categories
Under Settings ⇾ Categories there are two categories that are specific to inventory.
Inventory colors: this will be used when creating your inventory to you will want list colors that help denote items. (example: black, red, multi-color, etc)
Inventory Sizes: this will be used when creating inventory to denote the size of an given item example: XS, Small, XL, etc)
As with all categories, you can add a new one under a category by clicking “new category” and filling in the top information. Order in this context will place the category in a display order so make your smallest size 1, your second smallest size 2, etc if you want it organized in your menus when creating inventory. Ignore “icon settings” when setting up inventory as the do not apply to these categories. Edit an existing category by clicking the pencil or archive by clicking the trash can.
Inventory Tab

If your group permission has been activated you’ll see Inventory as a left side main menu item. When you click on this you’ll be taken to the main inventory tab.
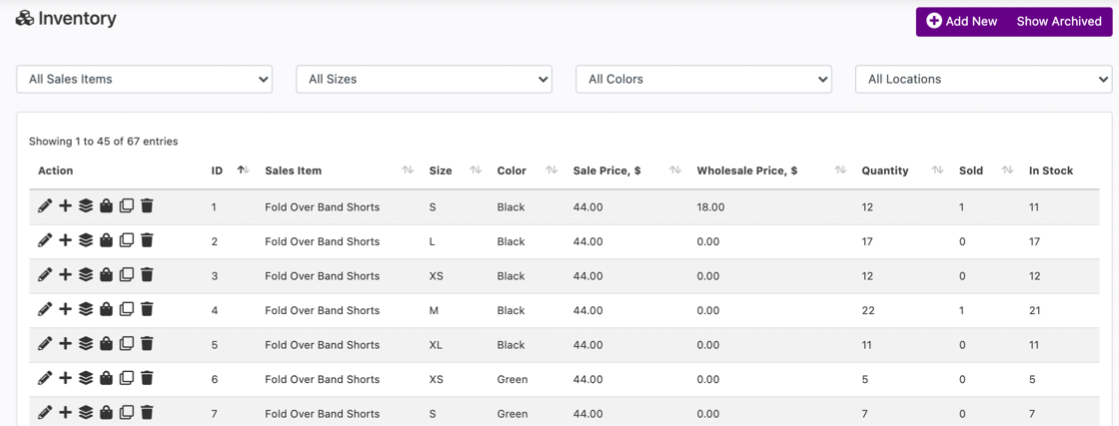
To add a new new inventory item click the “add new” box in the upper right.
Active inventory is automatically on display, click show archived to see archived inventory.
There are filters at the top of the page to find what you are looking for faster.
Pencil Icon – allows you to edit inventory information
+ sign – allows you to edit stock from the inventory page instead of going to the “inventory stock page”
Three boxes stacked icon – takes you to the inventory stock page Purse icon – shows you purchase history for inventory
Paper copy icon – clones an inventory item
Trash can icon – archives an inventory item
Adding Inventory Category
Create the SALES ITEM for any inventory first. Then add the inventory item here to correspond with the already created sales item. This allows you to sell the item online and in the shopping cart. This also allows you to set up discounts, coupons or membership discounts for each sales item. This also allows sales tax to work as already set-up on a per item sales or system wide basis.
Each inventory item allows you to set the sales item, size, color, sale price, wholesale price. Then you will enter stock and at that time you have the option of setting different locations for the same inventory category with different stock amounts.
Start by clicking “add new” then fill in the information.

The sales item should correspond to your already created “sales item”. Size and Color will pull from your already made categories.
IMPORTANT: you can set a different sale price here, it is best practice to tick the “use item price” that was already created or this other price can populate in the shopping cart.
Fill in wholesale price. Save.
Adding Stock
You can add stock by clicking the + icon on the inventory list. A pop up will open and you’d select the location and quantity.

Or click the Three boxes stacked icon to be taken to the inventory stock tab.
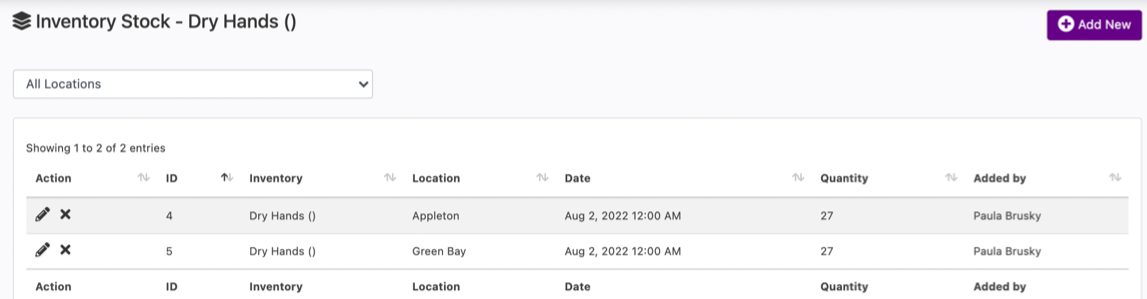
To have stock at more than one location, you’ll want to go to this page, “add new” and create the stock at each location.
Click the pencil to edit.
Click the x to delete. Note, this is a delete NOT an archive. So this is for if you made a mistake.
Inventory Report
Is similar to the sales by category report.
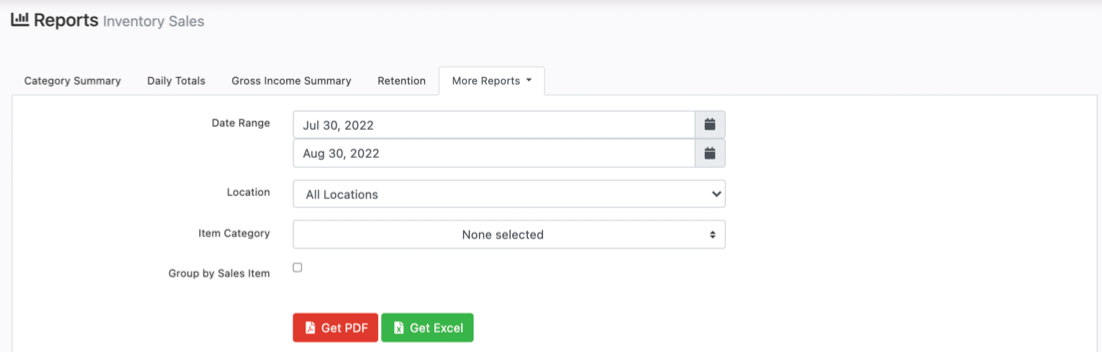
Set the date range for the report.
Set the location.
Check the item categories you wish to see.
Ticking the “group by sales item” will show them in sales items grouping whereas leaving unchecked will show purchase by client.
Inventory also shows on the “Purchases” Tab with the available filters.
